Building the CNC Machine
The machine shown in the following video is a only prototype. It was a temporary platform to develop and test the software. To make a long story short. The real machine to be retrofitted for the CNC controls is actually in the garage. The problem I encountered is; the garage gets very cold during the winter months. So I built the machine so I can write the software inside a warm house during the winter months instead of the garage. After all most of the software was written during the winter.
The XY table was bought. It only cost $90 dollars. You can probably get one for less. All of the pulleys and belts were bought from Stock Drive Products (http://www.sdp-si.com/).
The X and Y motor mounts were the parts designed and machined by me. The plans are based off of design articles from the Home Shop Machinist Magazine (http://www.homeshopmachinist.net/). Roland Freistadt was the author. There are other plans out there.
The Z Axis was copied from a design on the website “CNC on a Budget” http://www.cnconabudget.com/. The design was simple and very straightforward and very inexpensive to make.
The CNC controllers are from JR Kerr Engineering (http://jrkerr.com/). The company has been around a long time. The prices for the control boards are pretty good. One board controls one axis, therefore you will need 3 of them for the XYZ axis.
I used an Xbox Joystick to move the stage. The software is based off of the open source project by – Jean Phillipe Steimetz. There is a lot that can be done with the Joystick. A lot of the buttons on the Game Controller can be assigned functions such as setting the origin of a coordinate system or setting the tool offsets. You can probably use it to navigate the UI. There is more to come on this section.
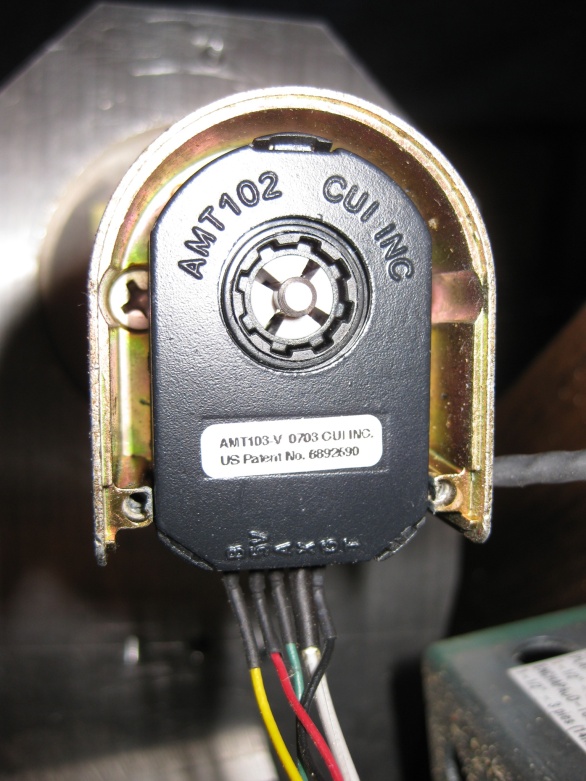
AMT102 Encoders from CUI INC
The motors used for the mill were bought from a surplus store online. The price was right, but they needed new encoders. Encoders are the most important part of the servo motor. The device keeps track the motors location. The mill uses the AMT102 encoder from CUI INC. You can buy them from Digi-key Electronics.
http://www.digikey.com/product-search/en/sensors-transducers/encoders/1966131?k=AMT102.
This is the link to the encoder kit. The kit includes the following;
- 7 shaft adaptors that fit most motors.
- Encoder itself.
- Encoder housing to mount to the motor.
- Tool to mount the encoder.
This is what the encoder looks like
The setup was relatively straightforward. It took about a few minutes.
The advantages of this encoder over others;
- The CPR can be configured. At least for this model.
- The encoder kit comes with shaft adaptors to fit the common sizes of shafts. This option gives the user more flexibility to move the encoder to a different motor if needed. Other manufacturers do not have this option.
- Lower cost. These encoders cost less than their counter parts from other manufacturers. This model is around $28.
The encoders do a good job controlling the motor position. In the video, the mill cuts out a pretty good circle.
Therefore, the encoders are doing their job well.
Machining the parts for the CNC mill
When I started designing the machine, I knew very little about how to machine parts. Thanks to the machinist and other employees at work they were able to instruct me. I value their help and guidance. Blogging about setting up a simple machine shop could take an infinite number of blogs, but this will be brief.
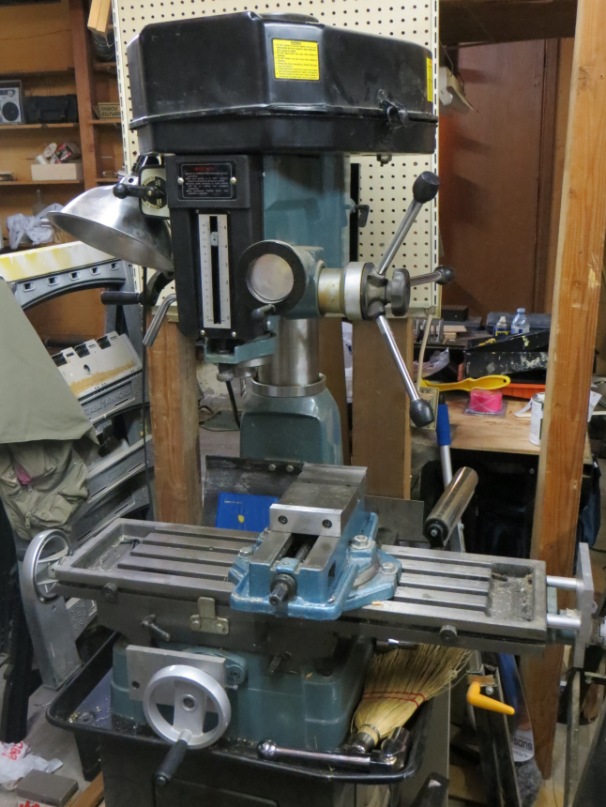
I have a very simple machine shop. The 2 main pieces of the shop are a variable speed band saw and a mill drill. The mill drill was purchased from ENCO. It is a good machine for the price, but I would recommend getting the one from Jet Tools. The one in the photo is the 2 hp version. I would recommend getting the smaller version with the 1 hp motor. The photo shows the mill with the vice mounted on the table.
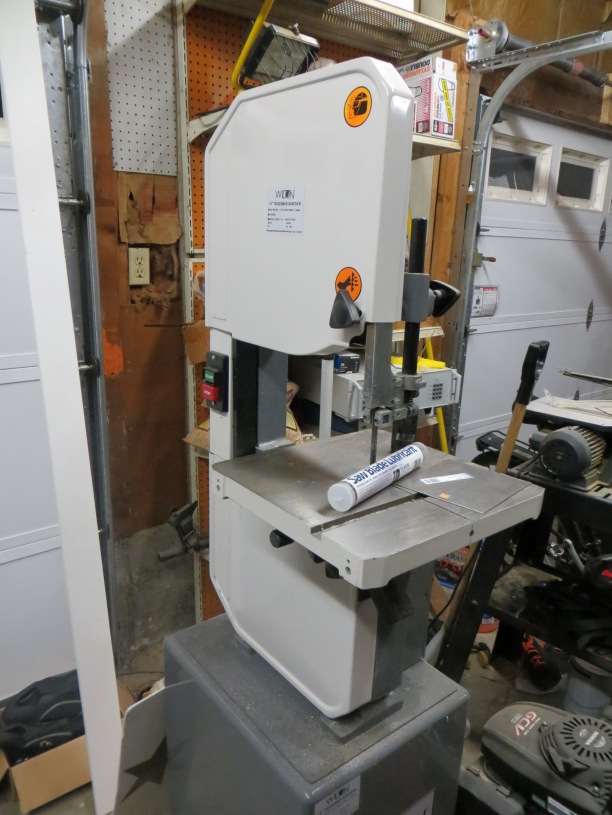
The band saw was purchased from Wilton. You can buy a similar saw from MSC Industrial, Grizzly Tools. When you cut metal the blade needs to run slow(100 sfm or slower). The saw can be configured to accommodate the slow speeds. The saws you see at Home Depot might not work, because they cut too fast(3000 sfm). If you are cutting metal with a fast moving blade, the blade will get hot and break. Or it will wear the teeth off the blade in minutes.
The next items you need;
- Machine vice to hold down your parts
- Caliper to measure your parts
- set of drill bits and pilots.
- set of reamers.
- set of collets.
- set of parallels.
- set of end mills.
- Bore head and cutter sets.
- simple punches to start pilot holes
- clamping sets.
- a tapping set (inch and metric).
Most of the tools were purchased from MSC Industrial. When you are first building your shop, I recommend purchasing the less expensive tools. MSC Industrial provides different grades of tools. I recommend generally (but not always) buying the “Import” grade. They are much cheaper in price.
If you discover you like machining and you want to make a living at it, then buy the professional grade of tools. When you are running a shop for profit, you need to have the best and most reliable tools. Having cheap tools and breaking on you can be expensive. If the tool breaks, production shuts down and you lose revenue. If you send someone out to replace the tool, then you increased your production cost. Added labor means added cost.


The aluminum was purchased from MSC Industrial Supply. They have 2 day shipping. There are other places that sell the metal at cheaper prices.
Software for CNC Machine
I used CAMBAM for the CAD/CAM. This is a great software package. Their online videos for training are the greatest. You can learn to use the software in 10 minutes. You won’t be an expert, but you will be good enough to use it.
The work flow for the CNC mill is as follows;
- Create the G-code file from CAMBAM.
- Run the CNC mill software.
- Move you stage to the desired position on the stage.
- Load the G-code file into the CNC mill Software. The software displays the G-code file in the control panel.
- Hit the Run button on the CNC mill Software UI.
- The mill starts cutting the material.
The video will show you how to create a G-Code file from a CAD file drawn in CAMBAM.
The software is written in WPF C# and C++. Actually, most of the effort was writing the software to control the machine.
All the low level functionality resides in native C++ DLLs. The main functionality of the DLLs controls the stage and cutting path. One DLL parses the G-code to be read into the stage and path DLLs. Other DLLs provide the mathematical functions to transform the coordinate system of the machine.
The User Interface is written in WPF. I started using Windows Forms, but WPF had better support for Graphics. The UI was separated from the functionality to minimize the dependency on the low level functionality. Switching from the Windows Forms to WPF was a minor change.
Also I realize the importance of unit tests. I wrote unit tests for the lower level functionality. The unit tests forces you to minimize the dependency between each object. So if you wanted to create another type of project, you could reuse the code.